How to Stretch Pizza Dough Without Tearing It
Warm dough, relaxed gluten and a little gravity do most of the work. Here's the hand-stretching method, plus how to fix a hole when one opens.
Pizza dough tears for a short list of reasons, and most of them are settled before your hands touch it: the dough is too cold, too tight, or past its prime. Get it to at least 50°F (10°C), let it rest whenever it fights back, press it out from the center while leaving the rim alone, and let gravity finish the job over your knuckles.
Pull hard on the middle and you will make a hole. Rotate the dough and let its own weight do the stretching, and you mostly won’t. The method below is written for hand-stretched rounds made from a classic New York-style pizza dough, but the same rules hold for almost any round pie.
At a glance
- Stretch dough that has warmed to at least 50°F (10°C) inside. Straight from the fridge it is usually 40°F (4°C) or colder, and noticeably stiffer.
- If the dough shrinks back, cover it and leave it alone for 10 to 15 minutes. Forcing tight gluten is the fastest way to a hole.
- Press from the center outward with your fingertips, leaving a ½- to ¾-inch (1 to 2 cm) rim untouched.
- Finish over your knuckles, rotating constantly, then hold the skin up to a light to find thin spots before they tear.
- Skip the rolling pin for New York-style pies; it presses out the gas that makes the rim puff.
Why pizza dough tears
A tear is simply a spot where the gluten got thinner than it could stand. Gluten pulls in two directions at once: elasticity makes dough snap back, and extensibility lets it stretch. Every cause below tips that balance the wrong way or concentrates the stretch in one place.
The dough is too cold
Cold dough is firm dough. Tom Lehmann, a dough consultant and former director of bakery assistance at the American Institute of Baking, wrote in PMQ Pizza Magazine that dough balls usually come out of a pizzeria cooler at 40°F (4°C) or below, and he recommended letting them warm to an internal 50°F (10°C) before opening them into skins. Colder than that, the dough stays stiff, and the harder you pull, the more likely it is to split instead of stretch.
The gluten is too tight
Dough that was just balled, just reshaped or handled roughly has tensed-up gluten. It springs back the moment you let go. That isn’t a flaw in the dough, only a sign it needs a few minutes. Fight it, and the thinnest point gives way.
The gluten is underdeveloped
Dough that was barely mixed and then used after a short rise has a weak network. It feels slack, tears after an inch or so of stretching and won’t hold a thin sheet. The windowpane test tells you where you stand: stretch a small piece between your fingers and see whether light shows through before it rips. One caveat from King Arthur Baking: doughs that ferment for many hours can start out less developed, because the gluten keeps gaining strength while they rest.
The dough is over-fermented
Dough that rose too long or too warm goes the other way. It has more than doubled, lost its round shape and shows large bubbles, and a fingertip pressed into it leaves a dent that stays. Acids that build up during fermentation, along with the flour’s own enzymes, gradually break down gluten, so the dough stretches with almost no resistance and thins unevenly. Handle it gently and accept a slightly smaller pie.
Thin spots from pulling the center
Grab the dough and tug, and the center stretches more than the edges; King Arthur’s bakers warn that pulling this way can tear a hole. Lingering in one spot does the same thing. Rings and long nails can snag and rip the dough, too.
Too much or too little bench flour
Too little, and the dough sticks to the counter and rips when you lift it. Too much, and the surface dries out: the dough slides instead of gripping, small holes won’t pinch shut, and the excess can leave a raw-flour taste and char on a hot stone. Aim for a thin, even dusting and brush off any clumps.
If tears keep happening no matter how carefully you stretch, the fix is upstream, in the mixing, fermentation or timing. The guide to common pizza dough mistakes and how to fix them covers those problems in detail.
Get the dough ready before you stretch it
Start with temperature. Refrigerated dough needs at least an hour on the counter and often closer to two or three. King Arthur’s New York-style recipe calls for a minimum of 1 hour, our own New York-style dough recipe allows 2 to 3, and in Lehmann’s pizzeria guidance, cooler-cold dough balls took about two hours to reach 50°F (10°C). An instant-read thermometer pushed into the center of a ball settles the question. Keep the balls covered so the surface doesn’t dry out and crack.
Don’t overshoot, either. Lehmann’s rule of thumb for pizzerias was that once dough reaches 50°F, you have roughly a 2½- to 3-hour window to use it. Left on a warm counter much longer, it starts drifting toward over-fermented.
Then check relaxation. Press a fingertip gently into the ball: if the dent springs back instantly and completely, the gluten is still tight. If the dough fights you at any point while you stretch, stop, cover it with a towel or an upturned bowl and leave it for 10 to 15 minutes, longer if it still resists. The gluten relaxes on its own; force only makes it worse.
Tip: Making more than one pie? If the first ball fights you, cover it and start on the second. By the time you’ve finished stretching, the first will usually have relaxed.
How to stretch pizza dough by hand, step by step
King Arthur’s New York-style pizza recipe gives a useful map of the stages: a roughly 300 g ball is pressed to 8 inches (20 cm), tugged on the counter to about 10 inches (25 cm), stretched over the knuckles to 12 inches (30 cm), then given a final tug to 13 inches (33 cm). Bigger balls go bigger at every stage: the 380 g balls from our dough recipe press out to about 9 inches (23 cm) and finish at 14 inches (36 cm). The order stays the same.
1. Flour the bench lightly
Dust the counter with a thin, even layer of flour, semolina or a half-and-half mix. Set the ball in it, then flip it so both sides are lightly coated. You want enough to stop sticking, not a snowdrift.
2. Press out from the center, leaving a rim
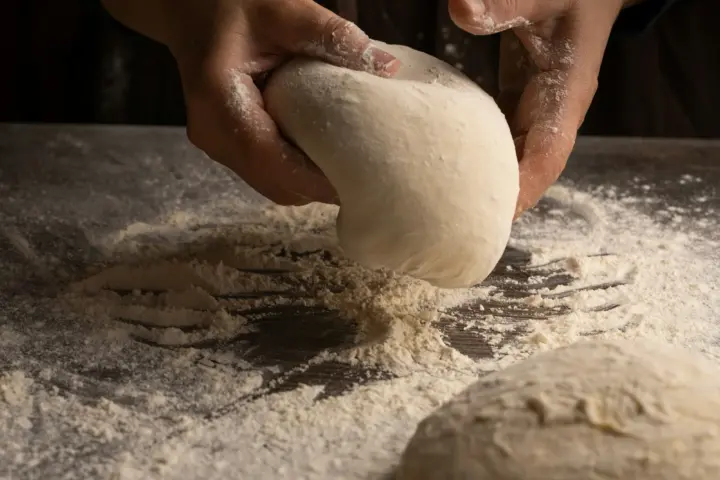
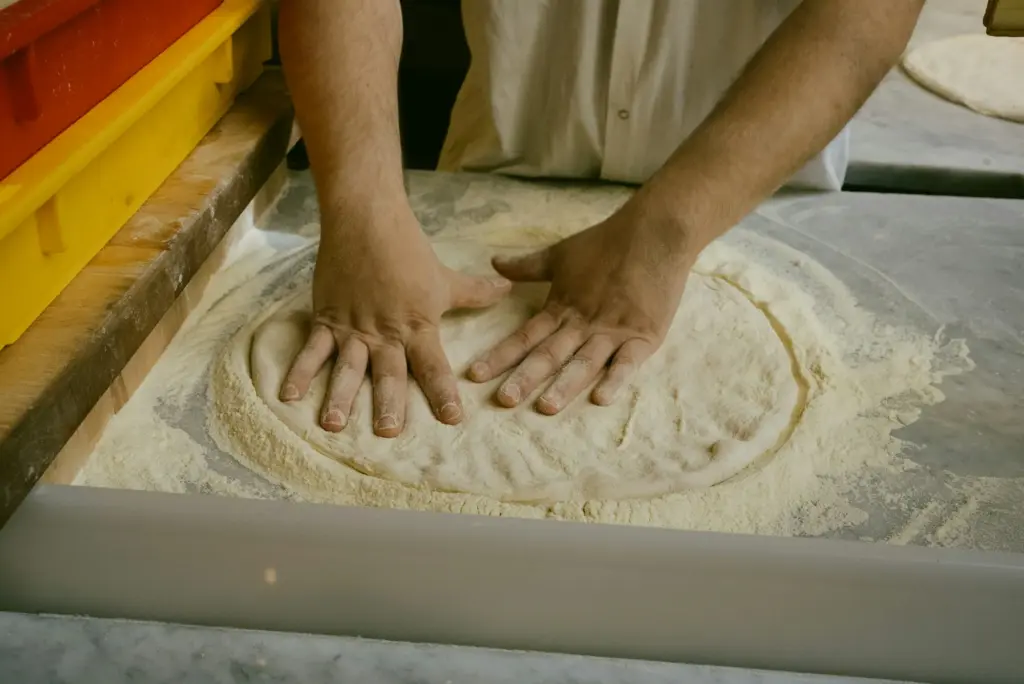
With the flat pads of your fingers, press the center of the ball down and work outward in a spiral, pushing gas from the middle toward the edge. Stop about ½ to ¾ inch (1 to 2 cm) from the edge and leave that ring alone; the gas you push into it is what makes the rim rise and blister in the oven. Flip the disk and press the second side the same way.
Press, don’t pull. You should end with a disk about 8 to 9 inches (20 to 23 cm) across, depending on the size of the ball, and a little thicker in the middle than looks right. Gravity will thin the center later.
3. Widen it on the counter
Lay both hands flat inside the rim and gently push them apart, then rotate the disk a quarter turn and repeat. Keep the movements small and keep turning. Two or three rounds should take you to about 10 to 11 inches (25 to 28 cm).
4. Knuckle-stretch and let gravity work
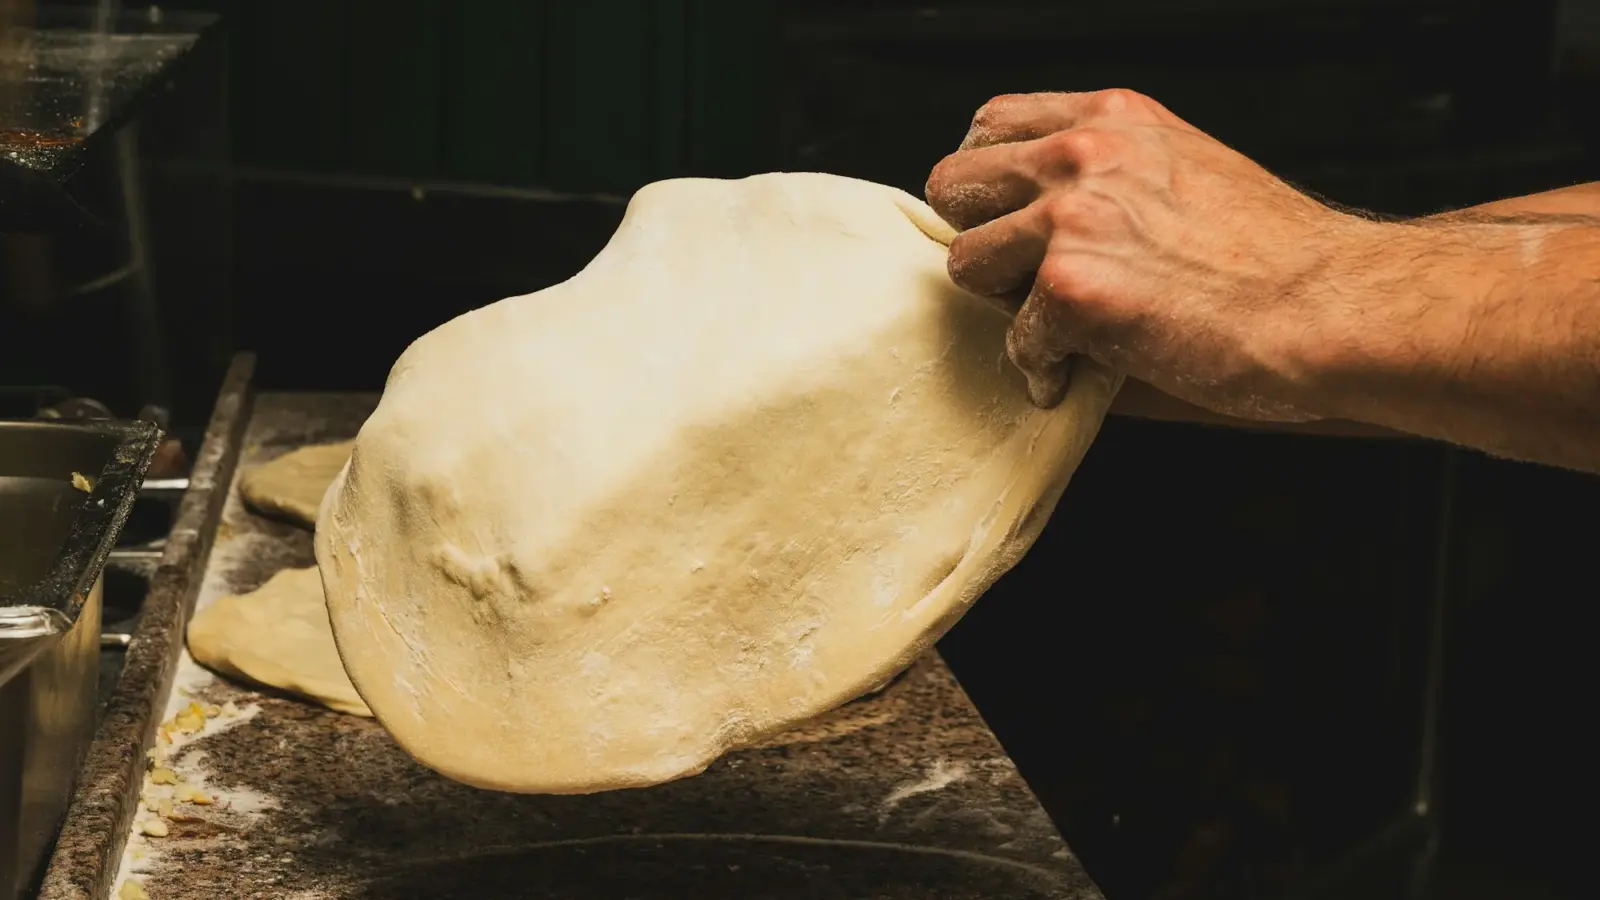
Make loose fists, tuck your thumbs in, and drape the disk over the backs of your hands so your knuckles sit just inside the rim, not under the center. Lift it to about chest height. Move your hands slightly apart, then bring them back together, turning the dough a few inches with each pass so it rotates like a wheel. The weight of the hanging dough does the stretching; your hands mostly steer.
Keep it moving. America’s Test Kitchen’s account of a night spent shaping pies at Dragon Pizza in Somerville, Massachusetts, makes the point that lingering in one spot is what leaves the dough thin and prone to tearing. If the center starts to look thin while the edge is still thick, shift your knuckles closer to the rim. If the dough suddenly stops giving, set it back on the floured counter and let it rest 5 to 10 minutes before you try again.
5. Optional: the slap
Some pizza makers, particularly in the Neapolitan style, use a slap: the disk is draped over one hand, flipped onto the floured counter so it lands with a little momentum, given a quarter turn and flipped again. It’s quick once you have the knack, but a heavy slap can flatten the rim, and the knuckle stretch gets you to the same place with less risk. For how the two styles differ beyond technique, see New York vs. Neapolitan pizza.
6. Check the thickness against the light
Hold the skin up to a window or a lamp. You’re looking for an even, faint glow across the middle; that light through the gluten is the same signal the Dragon Pizza crew uses to know a skin is stretched enough. A bright spot is a thin spot. Don’t stretch there again; work the thicker areas around it instead. A darker band just inside the rim means there’s still dough to borrow from.
7. Finish on the peel
Lay the skin on a lightly dusted peel and give the edge a last gentle tug all the way around to round it out to full size. Shake the peel to make sure it slides, then top it quickly; the longer a sauced skin sits, the more likely it is to stick. From there, follow the topping and bake in the classic New York cheese pizza recipe, and see how to bake crispy pizza in a home oven for preheating and stone or steel placement.
How to patch a hole in pizza dough
A hole is not a reason to start over. The pizzeria fix described in the America’s Test Kitchen piece is to skip past it, finish stretching, and then close it by pinching the dough around it together.
- Stop stretching near the hole. Pulling on its edges only makes it bigger.
- Finish the rest of the stretch, steering your knuckles around the weak spot.
- Lay the skin flat on the peel or counter. Pinch the edges of the hole together and press the seam flat. If the gap is too wide, nudge the thicker dough around it inward, overlap the edges slightly and press.
- Go light on sauce over the patch. Sauce that seeps through a hole glues the pizza to the stone or steel and scorches there.
Note: Don’t dust a hole with flour before closing it. Dry flour keeps the edges from sticking to each other, and the patch is likely to reopen in the oven.
If new holes open as fast as you close them, the dough itself is the problem. Cold or tight dough can be gathered back into a ball, covered and rested until it relaxes. Re-balling tightens the gluten all over again, though, so expect a much longer wait than the usual 10 to 15 minutes. Over-fermented dough is a different case: you can knock it back and reshape it, but the gluten has already weakened. Make a smaller, thicker pie, or turn it into garlic knots, which are far more forgiving.
Should you use a rolling pin for pizza dough?
For New York-style pizza, no. A rolling pin flattens the rim along with everything else and squeezes out the gas fermentation built up. Lehmann described the commercial version: a dough sheeter, essentially a motorized rolling pin, used to roll a skin to full size degasses the dough, leaving too little gas to leaven it properly in the first minutes of baking. King Arthur’s bakers add that a pin tends to leave uneven edges and makes a puffy outer crust hard to keep. Dragon Pizza owner Charlie Redd put it more bluntly in the America’s Test Kitchen piece: “We never roll.”
A rolling pin still has its uses:
| Method | Best for | What it does to the rim |
|---|---|---|
| Hand stretching | New York-style, Neapolitan and any pie meant to have a puffy edge | Keeps gas in the rim, so it rises and blisters in the oven |
| Roll partway, finish by hand | Beginners, stiff dough, pies that keep coming out thin in the middle | Lehmann’s advice for pizzerias with dough sheeters: sheet to 65 to 75 percent of the final diameter (about 8 to 9 inches for a 12-inch pie), then stretch by hand. Enough gas survives for the rim to puff. |
| Rolling pin all the way | Cracker-thin and tavern-style pies, which are rolled and docked by design | Leaves a flat, even edge and a denser, crisper crust with no real rim |
Troubleshooting: what the dough is telling you
| What you see | Likely cause | What to do |
|---|---|---|
| Shrinks back as soon as you let go | Tight gluten: just balled, overhandled or still cold | Cover and rest 10 to 15 minutes; check that it’s at least 50°F (10°C) inside |
| Slack and tears after an inch or two, even after a short rise | Underdeveloped gluten | Stretch it smaller this time; next batch, knead longer or ferment longer and check the windowpane |
| Very soft and sticky, big surface bubbles, dent stays when poked | Over-fermented | Stretch gently on the counter, keep it a little thicker; shorten the rise or keep it colder next time |
| Thin, see-through center with a thick, wide edge | Center pulled or stretched too long in one place | Knuckles closer to the rim, rotate more, press the center less |
| Sticks to the counter and rips when lifted | Too little bench flour | Lift, dust underneath, and keep the dough moving |
| Dry, floury surface; holes won’t seal; charred, raw-flour-tasting bottom | Too much bench flour | Brush off the excess; use a thinner dusting or semolina |
Sources
- Check Your Dough's Temperature Before Opening It Into Skins, PMQ Pizza Magazine (Tom Lehmann)
- How to Eliminate or Minimize Snap-Back in Your Pizza Dough, PMQ Pizza Magazine (Tom Lehmann)
- How to Achieve the Perfect Pizza Crust Edge, PMQ Pizza Magazine (Tom Lehmann)
- How to stretch pizza dough into a circle, King Arthur Baking
- Help! My pizza dough keeps shrinking back when I shape it., King Arthur Baking
- New York-Style Pizza Recipe, King Arthur Baking
- What is the windowpane test for bread dough?, King Arthur Baking
- A beginner's guide to gluten, King Arthur Baking
- How Do You Get Perfectly Shaped Pizza? I Worked in a Pizzeria for a Night to Find Out., America's Test Kitchen
- A Better Dust for Your Peel: Semolina, America's Test Kitchen
- How to stretch pizza dough, Gozney
- How to Fix Over-proofed Pizza Dough, Gozney
- John Carruthers' Chicago Tavern-style Pizza Recipe, Ooni
- Quality Enhancement Mechanism of Alkali-Free Chinese Northern Steamed Bread by Sourdough Acidification (Molecules, 2020; background on acid-activated proteases breaking down gluten), PubMed Central (NIH)